


Table of Contents
Table of Contents
Ever “pinged” a server and wondered what those milliseconds actually mean? If you’re a network admin or IT pro, you already use ping as a quick sniff test. But ICMP is more than a green checkmark or a scary timeout.
In this article, we’ll define ICMP, walk through how echo requests and replies work, and show how to turn basic pings into useful network and ICMP monitoring. You’ll learn how to spot and interpret latency, jitter, and packet loss, and where ICMP fits (and doesn’t) alongside your TCP/HTTP checks and device metrics, so you can baseline performance, set sane alerts, and troubleshoot faster.
What Is ICMP? 
ICMP (Internet Control Message Protocol) in networking is a control and diagnostic protocol that rides alongside IP. It isn’t a transport like TCP or UDP, since there are no ports, no sessions, and it’s not meant to carry application data. Instead, hosts and routers use ICMP to exchange short messages about network conditions.

What ICMP is used for?
ICMP exists to report how the network path is behaving so devices can react appropriately. Think of it as the network’s feedback channel rather than part of the payload delivery.
ICMP delivers network feedback so you can understand and react to path conditions, including:
- Errors: e.g., “destination unreachable,” “fragmentation needed.”
- Reachability: simple “are you there?” checks via echo.
- Timing/TTL info: helps detect timeouts and map paths.
The Most Common ICMP Tests
Here are the most common ICMP test teams run, plus what each one tells you and when to use it:
ICMP Echo (ping) reachability & RTT: Sends Echo Request/Reply to measure basic up/down and round-trip time. Good first check and the basis of continuous monitoring.
Continuous ICMP Ping for Jitter/Packet Loss: Run pings on an interval and look at variance (jitter) and missed replies (loss) over time to spot brownouts.
Traceroute (ICMP Time Exceeded): Uses TTL to map hops and find where RTT jumps or loss begins. Use rolling versions (e.g., mtr/pathping) for per-hop trends.
Path MTU Discovery (PMTUD) Pings: Send larger ICMP payloads (v4 with DF set; v6 relies on Packet Too Big). Confirms the maximum usable MTU and catches black-hole MTU issues. Example: Linux
ping -M do -s 1472 <host>; Windowsping -f -l 1472 <host>for a 1500-byte path.Dual-Stack Echo (IPv4 & IPv6): Run the same tests over v4 and v6—routes and policies often differ, so performance can too.
ICMP Ping Sweep (multi-target): Probe many hosts quickly (e.g., with fping) to see which subnets/segments are reachable and where problems are concentrated.
QoS/DSCP-Marked Ping:: Send Echo with a DSCP/TOS value to verify policy/QoS treatment along the path (support varies by OS/devices).
Source-Pinned Ping: Force a specific source interface/address to validate routing/VRFs and asymmetric path suspicions.
Rate-limit sensitivity check: Slightly increase probe frequency (not flood) to see if devices de-prioritize ICMP under load. Helps explain “ping looks worse than the app.”
Bidirectional A↔B tests: Run tests both directions (two agents) to infer asymmetry—one-way issues won’t show in a single RTT stream.
What are common ICMP message types you’ll see?
A few ICMP message types cover most day-to-day troubleshooting. Knowing these helps you interpret ping and traceroute results quickly.
- Echo Request / Echo Reply: The core of
ping; measures round-trip time and reachability. - Destination Unreachable: Includes codes like network/host/port unreachable, admin prohibited, fragmentation needed.
- Time Exceeded: Sent when a packet’s TTL/hop limit hits zero (how
traceroutediscovers hops).
Note: Many devices rate-limit or deprioritize ICMP, so absence or loss of ICMP isn’t always the same as an app outage.

Learn about what a traceroute is, how traceroutes work, how to read a traceroute, and how they help network engineers troubleshoot network issues.
Learn moreICMP vs. TCP/UDP (why it’s different)
ICMP is signaling, not data transport. That difference matters when you’re diagnosing issues.
- No ports: ICMP doesn’t talk to applications; it signals conditions to hosts/routers.
- Not a data plane: It’s meta-information about delivery, not the delivery itself.
- Best effort: Messages can be filtered or throttled, so treat results in context.
ICMPv4 vs. ICMPv6
ICMP is important in IPv4 and essential in IPv6. Blocking ICMPv6 broadly will break core IPv6 behavior.
- ICMPv4: Classic IPv4 control messages (echo, unreachable, time exceeded, etc.).
- ICMPv6: Even more important in IPv6—powers Neighbor Discovery (ARP replacement), Router Advertisements, and Path MTU Discovery (
Packet Too Big). Broadly blocking ICMPv6 will break core IPv6 functions. - Monitoring tip: Track both v4 and v6 paths; behavior and reachability can differ.
How Does ICMP Work (Under the Hood)?
Before we start charting dashboards, it helps to know what’s actually happening on the wire. This section walks through the mechanics behind a ping and a traceroute; how an Echo Request/Reply pair lets you measure RTT, how TTL and Time Exceeded reveal each hop, what Destination Unreachable codes really mean, and why ICMP can be rate-limited or deprioritized by routers.

1. Echo flow (ping)
Ping sends an ICMP Echo Request from Host A to Host B and expects an Echo Reply back. The sender timestamps each probe (often with an identifier/sequence), and when the reply returns, it computes round-trip time (RTT). Multiple probes let you see jitter (variance) and packet loss (missed replies over a window).
Flow: Host A → Echo Request → routers forward → Host B → Echo Reply → Host A measures RTT.
2. TTL & “Time Exceeded” (traceroute)
Every IP packet carries a TTL/hop limit. Routers decrement it by 1; if it hits zero, the router discards the packet and returns ICMP Time Exceeded.
Traceroute exploits this by sending packets with TTL=1,2,3… and recording who sends the Time Exceeded messages, revealing each hop and where latency jumps occur.
3. Destination Unreachable codes
When delivery can’t proceed, devices send ICMP Destination Unreachable with a code that explains why. Common ones:
Network/Host unreachable: routing can’t reach the prefix/host.
Port unreachable: host is up, but nothing is listening (common with UDP tests).
Fragmentation needed: packet too big and DF set (PMTUD signal).
Administratively prohibited: blocked by ACL/firewall.
(IPv6 uses similar semantics; e.g., “Packet Too Big” instead of fragmentation needed.)
4. Rate limiting & prioritization
Routers and hosts often rate-limit or de-prioritize ICMP to protect control planes. That means occasional ICMP loss or higher RTT can reflect policy, not a broken path. Treat ICMP as a fast health signal; confirm user impact with TCP/HTTP checks when results look suspicious.
Keep these mechanics in mind when reading your graphs: RTT comes from the Echo flow, hop-by-hop changes show up via TTL and Time Exceeded, and Unreachable codes tell you why delivery failed. If results look odd, consider control-plane policies like ICMP rate limiting before declaring an outage, and confirm user impact with TCP/HTTP checks.
What Is ICMP Monitoring?
Now, let's get into the good stuff! ICMP monitoring is how you turn a quick ping into a running heartbeat for your network. Instead of one-off checks, you schedule lightweight probes, watch the trend lines, and use the data to prove (or disprove) what’s happening on the path.
ICMP monitoring is active (synthetic) probing of targets at regular intervals using ICMP (typically Echo Request/Reply) to record latency (RTT), jitter (variance in RTT), packet loss, and reachability over time.
Probes are scheduled (e.g., every 1–30 seconds), stored as time series, and compared to baselines to trigger alerts. Running probes from multiple agents lets you see whether an issue is local, last-mile, or upstream.

What Is ICMP Monitoring Used For?
Here’s where ICMP monitoring earns its keep day to day, from watching links to validating changes and speeding up triage.
- Internet link health: Track RTT/loss to your ISP or upstream to catch congestion and brownouts.
- Branch/site monitoring: Watch gateways, VPN headends, and SD-WAN paths to spot site-specific problems.
- SLA verification: Validate provider guarantees for latency/loss and keep evidence for tickets.
- Change validation: After routing, firewall, or QoS changes, confirm paths are still healthy.
- Incident triage: Quickly tell “network vs. application” and narrow to hop/region before deeper digs.
What Is Active vs. Passive ICMP Monitoring (& Why Both)
Active probes and passive telemetry answer different questions. Pair them to catch issues early and confirm real user impact.
Active ICMP gives a fast, lightweight signal about path health, even when there’s little or no user traffic.
Passive tools (flows/NetFlow/IPFIX), SNMP (device counters), and application checks (TCP/HTTP) show utilization, errors, and user impact.
Used together, ICMP catches reachability/latency changes early, while passive/app layers tell you who’s affected and why.
Tip: Measure from multiple vantage points to isolate last-mile issues.
If you only ping when things are broken, you miss the story between incidents. Continuous ICMP monitoring gives you trendlines, baselines, and evidence, so you can separate last-mile blips from real outages and move faster when it counts.
Which Network Tools Use ICMP Monitoring?
ICMP shows up everywhere in your toolkit, from quick reachability checks to always-on monitoring. Use it when you need a fast signal about path health, then pair it with higher-layer tests when user impact is in question. A lot of your everyday utilities and monitoring platforms use ICMP for quick, low-overhead health checks.
1. Built-in OS Utilities
Your first responders. ping/ping6, traceroute/tracert, and friends give instant reachability and hop-by-hop visibility with zero setup. Perfect for sanity checks and quick baselines.
- ping / ping6 — Sends ICMP Echo Request/Reply to measure reachability and RTT.
- traceroute / tracert — Uses TTL + ICMP Time Exceeded responses (or UDP/TCP variants) to map hops.
- mtr / pathping — Combines ping + traceroute for rolling loss/latency per hop.

2. Troubleshooting CLIs
When you need more control or scale, CLI tools extend the basics: parallel pings, custom packet crafting, richer timing, and rolling per-hop stats for deeper investigations.
- fping — Parallel pings to many hosts; great for quick estate sweeps.
- hping — Crafts packets (ICMP/TCP/UDP) for deeper tests and firewall checks.
- nping (from Nmap) — Flexible pinger with per-probe timing and stats.
- Continuous Network Monitoring Tools
For continuous visibility (not just one-offs), network monitoring tools schedule ICMP probes from multiple vantage points, track RTT/loss/jitter over time, and alert on deviations. These platforms run lightweight, scheduled probes to measure path health continuously (not just when you remember to ping).
They collect time-series data (latency, jitter, packet loss, reachability), detect anomalies against baselines, and correlate results with path changes so you can spot problems early and prove what happened.
How Obkio’s Network Monitoring Tool Uses ICMP Monitoring
Obkio is a distributed, synthetic network monitoring platform that uses Monitoring Agents (cloud + on-prem) to run ICMP and TCP/UDP/HTTP tests between your sites, ISPs, and SaaS destinations.

It tracks latency, jitter, packet loss, and automatically captures traceroute when performance shifts, making it easy to see whether an issue is local, provider-side, or destination-side. Dashboards highlight trends and SLAs, and integrations push actionable alerts to your team.
Want to see it in action? Deploy an Obkio agent at a branch and another in your DC or cloud, then add a cloud agent to compare paths. Use the out-of-the-box ICMP tests to baseline RTT/loss and set smart alerts.


4. Packet Analysis
Analyzers don’t generate probes; they decode them. Use Wireshark/tcpdump to see the raw ICMP conversations (Echo, Time Exceeded, Unreachable) to validate what your tests are really seeing on the wire.
- Wireshark / tcpdump — Don’t generate probes, but decode ICMP so you can inspect Echo exchanges, Destination Unreachable, Time Exceeded, and PMTUD signals.
When ICMP is blocked or de-prioritized
If devices throttle or filter ICMP, switch to look-alike checks: TCP pings to known ports, lightweight HTTP requests, or DNS queries. You’ll keep a signal while respecting policy.
Most tools above can fall back to:
- TCP ping (e.g., SYN/ACK to a known port) for app-path realism.
- HTTP/HTTPS HEAD/GET to verify user-visible reachability.
- DNS queries to check resolver paths.
Tip: Many platforms (including Obkio) let you run probes from multiple agents/regions. That’s the fastest way to tell whether a spike is last-mile, provider, or destination-side.
Permissions note: Raw ICMP usually needs elevated rights. Agent-based tools handle this for you; on bare shells you may need admin/sudo.
What ICMP Monitoring Metrics to Track
Not every spike deserves a page. The signal in ICMP monitoring comes from a small set of metrics tracked over time (RTT, jitter, packet loss, reachability, and path changes). Get these right (with baselines and percentiles), and you’ll know the difference between “momentary blip” and “users are feeling this.”
A handful of network metrics tell most of the story. Track these continuously and alert on sustained changes, not single performance hiccups.

- Latency (RTT): Latency refers to how long a ping takes to go out and back;it is your baseline speed for the path. Baseline typical round-trip time and watch trends plus percentiles (p50 for typical, p95 for “bad but common”). Alert when p95 rises, say +40–60% over baseline for 10–15 min, or when the whole curve shifts after a change window.
- Jitter: Jitter refers to the short-term variation between successive RTTs. It’s the canary for real-time apps (voice/video). Track the rolling jitter (e.g., mean absolute delta over 1–5 min) and flag sustained elevation. Spiky jitter with normal average RTT often maps to choppy calls.
- Packet loss: Packet Loss refers to the percentage of data packets lost during transmission. Chronic packet loss points to congestion, errors, or filtering. Differentiate intermittent (bursty, short windows) vs sustained (minutes). Start with thresholds like 1–2% = warn, ≥5% = critical over a 5–15 min window. Loss plus rising jitter is a stronger incident signal than loss alone.
- Reachability: Reachability refers to the success rate of echo replies. Consecutive failures signal outages vs. one-off drops. Measure the success rate of Echo replies and require consecutive failures to alert (e.g., 3–5 misses) to avoid network flapping. Treat “down” differently from “degraded” (e.g., normal RTT but 20% loss).
- Path changes: Path changes refer to route/hop shifts seen in traceroute. They are often the hidden cause of new latency or loss. When RTT/loss deviates, capture a traceroute snapshot. Compare hop count, ASN/ISP, and next-hop identity against the last known good path. Sudden path or MTU changes often explain new latency or loss without a device being “down.”
Treat single probes as anecdotes and your trends as evidence. Correlate RTT, jitter, and loss with traceroute snapshots when things drift, and alert on sustained performance degradation, not one-off deviations. With these metrics dialled in, your dashboards tell a clear story and your tickets start with proof, not guesses.
What Are the Pros, Cons, and Limitations of ICMP Monitoring?
ICMP monitoring is the quickest way to get a heartbeat on your network performance. But like any heartbeat, it tells you something, not everything. Here’s how to think about its strengths, where it falls short, and the real-world quirks that trip teams up.
The Pros of ICMP Monitoring (why teams rely on it)
Before anything fancy, you need a fast, low-friction signal. That’s ICMP.
- Lightweight & fast to deploy: Works almost anywhere with near-zero setup, so that you can cover sites/ISPs in minutes.
- Low overhead: Tiny probes at short intervals won’t stress links or gear.
- Ubiquitous: Every OS and most network devices support it, making automation and baselining straightforward.
The Cons of ICMP Monitoring (what it can’t show you)
ICMP is path health, not application health. Keep that boundary clear.
- Throttled or blocked in places: Routers/hosts often police ICMP, so drops or spikes can reflect policy, not congestion.
- No app-layer visibility: It can’t see TLS handshakes, server queues, or HTTP status. Great early warning, not a user-experience verdict.
ICMP Monitoring in the Real-World
This is where misinterpretation creeps in. A few patterns to watch:
Different treatment than user traffic: Many networks de-prioritize ICMP versus TCP/UDP, skewing RTT/loss compared to apps.
NAT/firewall quirks: Inbound Echo can be blocked, stateful inspection may drop replies, PMTUD signals vary by device.
Asymmetric/ECMP paths: Forward/return paths and per-flow hashing mean “RTT” isn’t tied to a single hop.
Control-plane protection: CoPP/rate-limits cause occasional misses under load, even when the data plane is fine.
Dual-stack surprises: IPv4 and IPv6 can behave differently; monitor both to avoid blind spots.
Use ICMP as your early-warning light: perfect for spotting reachability, loss, and latency shifts fast. When the light turns on, confirm user impact with TCP/HTTP checks and correlate with traceroute/path changes.

What are the Best Practices for ICMP Monitoring?
If you only ever ping when something feels slow, ICMP looks deceptively simple. The moment you turn it into continuous monitoring, a few practical questions pop up: how often should probes run, what counts as “real” loss vs. Internet noise, and when should an alert actually page someone?
Good ICMP setups aren’t about cranking the probe rate to eleven; they’re about choosing sensible intervals, setting thresholds that reflect your own baseline, and measuring from the right places so you can tell last-mile blips from upstream trouble.
1. Determine Probe Frequency
Probe frequency refers to how often to ping so you see change without flooding the path. Set probe intervals that are frequent enough to capture meaningful changes in performance, but not so aggressive that they create unnecessary traffic or noise. Use shorter intervals for links that support real-time workloads and longer intervals for general network health checks.
- Sensitive links / real-time apps: Every 1–5s. Great for voice, video, and critical WAN circuits.
- General health checks: Every 15–60s. Enough to spot trends without extra chatter.
- Tip: Use shorter intervals between internal agents (cheap) and longer to the public Internet (noisy/variable).
2. Set Alert Thresholds
Translate raw measurements into alerts that reflect sustained problems rather than random spikes. Anchor thresholds to your own baselines (latency and jitter) and require consecutive failures before paging to avoid flapping.
- Loss: Start with 1–2% = warn, ≥5% = critical over a 5–15 min window.
- Latency: Alert on baseline + variance (e.g., +50% p95 for 15 min), not on a single spike.
- Reachability: Require 3–5 consecutive misses before paging; otherwise just log.
- Jitter (optional): Flag sustained elevation above your normal range when voice/video matter.
3. Establish A Baseline Performance
Establish what “normal” looks like before you enforce rules. Compare off-hours and peak periods and keep several weeks of history so slow drifts and seasonal patterns are visible.
- Compare off-hours vs peak to understand seasonality.
- Keep 30–90 days of history to catch slow drifts.
- Track p50 and p95—the gap tells you how bursty things get.

4. Enforce A Multi-Endpoint Strategy
Monitor several types of targets (gateways, SaaS endpoints, DNS resolvers, and data centers), so you can quickly determine whether an issue is local, provider-side, or destination-side.
- Gateways & VPN headends: Prove local/site health.
- Critical SaaS & APIs: See user-visible paths.
- DNS resolvers: Quick signal for “Internet feels slow.”
Data centers / clouds / inter-site: Validate backbone and ISP routes.
Tip: Run probes from multiple vantage points (branch, DC, cloud) to isolate last-mile vs upstream.
5. Blend ICMP with Continuous Monitoring
Combine ICMP with TCP/HTTP/DNS checks and automatic traceroute to get a complete picture. ICMP tells you the path is changing; the higher-layer tests confirm user impact and help pinpoint where the problem sits.
- TCP/HTTP checks validate that real application paths work when ICMP is noisy or filtered.
- Scheduled traceroute snapshots when RTT/loss deviates reveal hop/ASN/ISP changes.
- DNS lookups and port-specific TCP pings catch resolver and service-specific issues.
- Correlate with device data (SNMP counters, interface errors) to explain why the path degraded.
- Alert flow: ICMP raises the hand → TCP/HTTP confirms user impact → traceroute shows where.
Obkio is a distributed performance monitoring platform that pairs ICMP with TCP/UDP/HTTP synthetic tests and automatic traceroute.

Lightweight agents (cloud + on-prem) run continuous probes between your sites, ISPs, and SaaS, tracking latency, jitter, packet loss, and capturing path changes when performance shifts, so you can tell last-mile from provider or destination issues, and back it with evidence.
Spin up one Obkio agent at a branch and another in your DC or cloud, then add a cloud agent. Enable ICMP plus a couple of TCP/HTTP checks for your key apps, set the baseline thresholds above, and let Obkio auto-snapshot traceroutes on anomalies.
In a few minutes, you’ll have clean signals, sensible alerts, and path-level proof for tickets.
6. Set Security-Friendly Settings
Configure probes to respect network policies and device limits. Keep payloads small, honour rate limits, allow-list only where necessary, and include both IPv4 and IPv6 so you don’t miss policy differences.
- Respect rate limits: Cap probe PPS; avoid bursty schedules across many targets.
- Small payloads: 32–64 bytes is plenty for RTT; only increase if you’re testing MTU.
- Allow-lists: Permit Echo on trusted interfaces only; keep it egress-first from agents.
- Dual-stack: Monitor IPv4 and IPv6—policies and paths can differ.
- Document policy: Note which segments de-prioritize or block ICMP so ops reads results in context.
Dial in frequency, thresholds, and baselines, then spread probes across the right targets. You’ll cut alert noise, spot real degradation early, and show clear evidence when you open a ticket.
How-To Setup ICMP Monitoring: Example Setup
The goal is a lightweight, always-on heartbeat that’s meaningful and quiet. Start small, baseline for a couple of weeks, then tune. Here’s a setup that you can replicate in most business environments.
1. Choose the Right ICMP Monitoring Tool (standalone vs platform)
Standalone tools (e.g.,
ping,traceroute/mtr,fping,nping): great for ad-hoc tests and one-off diagnostics. They’re quick and flexible, but you’ll need to script scheduling, storage, baselines, and alerting yourself, and you’ll be limited to a few vantage points.Network monitoring platforms using ICMP: run distributed agents, schedule probes automatically, correlate RTT/loss/jitter with traceroute snapshots, keep long-term history, surface p50/p95 trends, and integrate with chat/ticketing for alerts.
- Example (Obkio): Agents (cloud + on-prem) run ICMP and TCP/HTTP/UDP tests between sites, ISPs, and SaaS. The platform baselines latency, jitter, packet loss, auto-captures traceroute on anomalies, and lets you share evidence with providers.
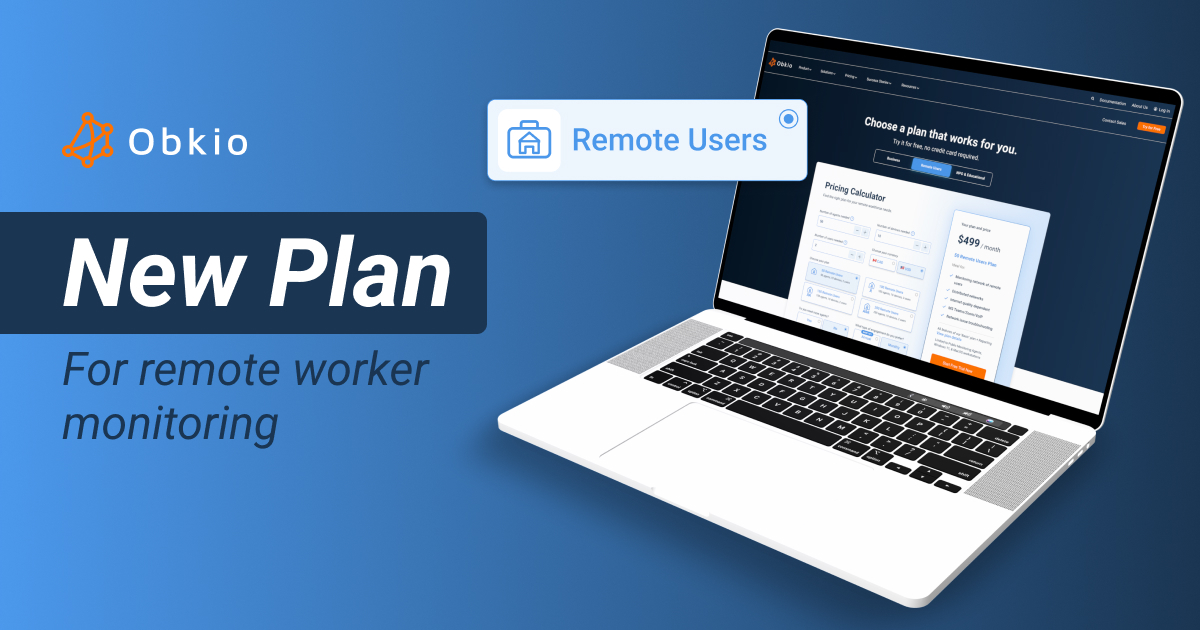
 Screenshot from Obkio's Network Monitoring Tool
2. Choose Targets (a small, diverse set)
Pick a handful that map to how users actually reach things:
- Default gateway: proves local/site health.
- Upstream ISP hop: first router outside your edge (find it with traceroute).
- Public DNS resolver: e.g., your ISP’s resolver or a well-known anycast resolver.
- Key SaaS/endpoints: the apps your users feel (M365, Salesforce, your public site/API).
Tip: Aim for 3–6 targets per site. Too many targets = noisy dashboards; too few = poor coverage.
3. Set Intervals & Payload
Keep probes light so they survive rate-limits and don’t add noise.
- Interval: start at 1–5 seconds for critical links; you can relax later if it’s too chatty.
- Payload size: 32–64 bytes for RTT/loss. Only go larger if you’re explicitly testing MTU.
4. Set Thresholds (baseline first, then auto-tune)
Let real data define “normal,” then alert on sustained deviations.
Baseline window: collect at least 30 days to capture peak vs off-hours.
Initial rules (examples):
- Latency: alert when p95 RTT is ≥ +50% over baseline for 15 minutes.
- Packet Loss: 1–2% = warn, ≥5% = critical over 5–15 minutes.
- Reachability: require 3–5 consecutive misses before paging.
- Jitter (if voice/video matters): alert on sustained elevation above baseline.
Auto-tune: after ~2 weeks, tighten thresholds using your collected p50/p95.
5. Create Customized Dashboards
Build views that highlight change, not just raw numbers.
- Core tiles: RTT p95, loss %, jitter, and reachability per target.
- Context: annotate deployments, ISP maintenance, and routing changes.
- Comparisons: side-by-side site and ISP views; separate IPv4 vs IPv6 panels.
6. Configure Alerts (grouped and de-flapped)
Design alerts that point to a domain you can act on.
- Group by site/ISP so one bad provider event doesn’t open dozens of tickets.
- Require sustained breaches (time windows + consecutive misses).
- Escalate by evidence: if ICMP fires and a simple TCP/HTTP probe fails, raise severity; if ICMP alone is noisy, lower priority and investigate policy/rate-limits.
With a few well-chosen targets, short intervals, and baseline-driven thresholds, ICMP becomes a quiet but reliable early-warning signal. Keep the dashboards focused on p95 RTT, loss, and jitter, annotate change, and group alerts by site/ISP so you act on patterns.

How to Troubleshoot with ICMP (Step-by-Step)
ICMP tells you that something changed; troubleshooting is about finding where and why. The fastest path is a structured loop: scope the impact, correlate signals on a single timeline, confirm with traceroute, check whether apps are actually affected, and then isolate variables with alternate probes. Follow that order and you’ll move from a noisy graph to a specific hop, link, or provider you can act on.
Use this flow to move from “the graph looks bad” to a concrete cause and a useful ticket.
Step 1: Confirm the scope of the performance issue
Decide whether the network problem is local or widespread. Compare multiple agents/locations, IPv4 vs. IPv6, and (if you have them) multiple ISPs. If only one site-to-anywhere looks bad, it’s likely last-mile. If many sites-to-one destinations fail, focus on the destination or its upstream.

Step 2: Correlate the Signals
Overlay RTT, jitter, packet loss, and reachability on the same timeline. You’re looking for synchronized changes: sustained loss with rising jitter suggests congestion; a step-change in RTT without loss often points to a path change. Note maintenance windows or recent config changes.
This step is far easier with a network monitoring tool, like Obkio, that automatically correlates these metrics and interprets patterns for you. It can highlight statistically significant shifts, annotate changes, and attach traceroute snapshots when thresholds are crossed.
Step 3: Run/Inspect Traceroute Results
When metrics drift, capture a traceroute snapshot from the affected vantage points. Identify the first hop where RTT jumps or loss begins, and record its IP/hostname/ASN. Watch for peering changes, extra hops, or MTU issues (e.g., “Packet Too Big”/fragmentation needed).
This is even easier with a platform like Obkio, which includes a built-in traceroute tool, so you can auto-capture paths when thresholds are crossed and also launch on-demand traceroutes from specific agents/paths, with hop IP/hostname/ASN preserved for comparison.

Step 4: Differentiate Control vs. Data Plane
Check whether the issue is ICMP-only or affects application paths too. Run a TCP ping (SYN to a known port) or a lightweight HTTP/HTTPS check to the same target.
- ICMP loss but TCP/HTTP healthy: likely ICMP de-prioritization/rate-limit.
- Both ICMP and TCP/HTTP degraded: real path problem—keep digging.
Step 5: Isolate with Alternate Probes
Change one variable at a time: probe from a different region/agent, to a different target type (gateway, DNS resolver, SaaS), or over a different link.
- Consistent failure from one site to many targets = local/last-mile.
- Consistent failure from many sites to one target = destination or its provider.
Mixed results can indicate asymmetric return paths.
Step 6: Open A Ticket with Your ISP/Provider with Evidence
Share a concise bundle: timeline, affected sites/targets, loss %, p50/p95 RTT before vs. after, and traceroute hops** where the issue appears (IP + ASN/hostname). Include timestamps and time zones, note dual-stack differences, and attach a couple of snapshots from different vantage points to prove it isn’t a single-host anomaly.
With Obkio, you can easily share/export traceroute results (including hop IP/hostname/ASN and timing), so you can prove to the ISP that the fault is on their side rather than yours.
When you can say “RTT jumped at hop 7 inside ASXXXX at 14:32, with 8–10% loss across two regions on both v4 and v6,” you’ve turned suspicion into evidence. Save traceroute snapshots, include timestamps and time zones, and annotate recent changes so the next incident is even faster. If the fault sits outside your domain, hand off a ticket with the hop-level proof. Otherwise, you’ve already narrowed it to the device, link, or policy you control.

Learn how to use Obkio Vision’s Visual Traceroute tool to troubleshoot network problems with traceroutes in your LAN, WAN, and everything in between.
Learn moreICMP vs. SNMP: Comparing Protocols
ICMP and SNMP both tell you about network health, but they look at different parts of the picture. ICMP is an end-to-end path signal; SNMP is device-level telemetry. Use ICMP to know if the path is healthy right now, and SNMP to know what a specific box/interface is doing.
What each protocol measures
ICMP (ping/traceroute): Active probes that report latency (RTT), jitter, packet loss, and reachability between two points. Great for catching user-visible degradation quickly and for isolating last-mile vs. upstream issues with multiple vantage points.
SNMP (Simple Network Management Protocol): Periodic polls (and traps/informs) that expose device counters and status: interface utilization, errors/discards, CPU/memory, temperature, power, BGP/OSPF states, etc.
Where they sit in the stack
ICMP: Control/diagnostic traffic alongside IP; no ports, minimal setup.
SNMP: UDP/161 for polling, UDP/162 for traps; requires credentials/ACLs and device configuration.
Strengths of ICMP vs. SNMP
ICMP:
- End-to-end view that mirrors user experience better than device counters alone.
- Lightweight and fast to deploy anywhere.
- Immediate feedback on path changes (when paired with traceroute).
SNMP:
- Deep visibility into why a device might be causing problems (e.g., interface errors, queue drops, CPU spikes).
- Historical counters make capacity planning and trend analysis straightforward.
- Eventing via traps for state changes.
Limitations of ICMP vs. SNMP
ICMP:
- Can be rate-limited or de-prioritized and doesn’t see application or device internals.
- Tells you there is a problem, not which interface or process caused it.
SNMP:
- Polling intervals (e.g., 1–5 minutes) may miss short bursts; “what happened between polls” can be fuzzy.
- Coverage depends on vendor MIBs/OIDs and correct device configuration.
- Security: avoid v2c in favour of SNMPv3 (auth/privacy) wherever possible.
How they complement each other (recommended workflow)
Detect with ICMP: Continuous probes flag rising RTT/jitter/loss or reachability drops.
Localize with traceroute: Confirm where the path changed (hop/ASN/MTU).
Explain with SNMP: Check the implicated device(s) for interface errors/discards, high utilization, QoS queue drops, CPU/memory, or link flaps around the same timestamps.
Decide action: If ICMP is noisy but SNMP looks clean, consider ICMP de-prioritization/policy; if both point to trouble, you likely have a real path or device issue.
Quick cheat sheet
- Question: “Are users feeling slowness right now?” → ICMP
- Question: “Which link or box is misbehaving?” → SNMP
- Best practice: Run both—ICMP for early warning and end-to-end truth; SNMP for root-cause evidence.
Think of ICMP as your heartbeat monitor and SNMP as your bloodwork. One tells you something’s off in real time; the other tells you what part of the body is responsible. Combine them and you’ll move from vague symptoms to precise fixes much faster.

Learn about what SNMP monitoring is & how to use it to monitor performance of networking devices like firewalls, routers, switches and wifi access points.
Learn moreComparing ICMP vs TCP/HTTP/UDP Monitoring
These probes answer different questions. ICMP tells you whether the network path is healthy. TCP/HTTP tells you whether a specific application path works end-to-end. UDP tells you how a path behaves for real-time traffic. Use them together to move from “something changed” to “users are affected” to “here’s why.” Let’s dive deeper.
1. ICMP: Link health & reachability (control-plane view)
Lightweight Echo Request/Reply probes measure RTT, jitter, packet loss, and reachability between two points. They’re fast to deploy and great for early warning and last-mile isolation (especially with multiple vantage points and traceroute snapshots). Limitation: devices may de-prioritize or rate-limit ICMP, and it doesn’t see app-layer details.
2. TCP/HTTP: App-path realism (ports, TLS, server stack)
TCP probes exercise handshakes, ports, and firewall rules on the actual service path; HTTP checks add TLS, headers, status codes, and sometimes content matching. These confirm user impact even when ICMP is noisy or filtered. They’re heavier than ICMP and more sensitive to app/server behavior, which is exactly the point.
3. UDP: Real-time behaviour (e.g., VoIP/MOS)
Synthetic UDP streams characterize jitter, loss, and one-way latency the way voice/video feel them. Many tools compute a MOS or similar quality score and reveal QoS/QoE issues (queueing, shaping, burst loss). Note that some networks block unsolicited UDP, so placement and allow-listing matter.
When to use each protocol (quick guide)
- Need a fast, low-overhead heartbeat? Start with ICMP.
- Want to know if users can actually reach/login/load a page? Add TCP/HTTP.
- Troubleshooting choppy calls or video? Run UDP/VoIP probes and watch jitter + burst loss.
- ICMP looks bad but the app is fine? Likely ICMP policy, trust TCP/HTTP for impact.
- App looks bad and ICMP is clean? Likely server/app or port-specific issue—dig into TCP/HTTP and server metrics.
Use ICMP for the fastest signal and path baselines. When it fires, or when ICMP is filtered, confirm impact with TCP/HTTP probes and, for real-time workloads, add UDP/VoIP tests to capture jitter and burst loss.
What Are the ICMPv6 Essentials?
ICMPv6 isn’t a “nice to have”, it’s an essential part of IPv6. If you treat it like ICMPv4 and block it broadly, core IPv6 functions break. Here are the pieces you need to allow and monitor.
Neighbor Discovery & Router Advertisements (why you can’t block ICMPv6)
- Neighbor Discovery (ND) replaces ARP in IPv6. It uses Neighbor Solicitation/Neighbor Advertisement messages to resolve L2 addresses and run Duplicate Address Detection (DAD).
- Router Advertisements (RA) tell hosts about prefixes, default gateways, MTU, and (with SLAAC) how to autoconfigure addresses.
- Practical guidance: Do not blanket-block ICMPv6. Instead, rate-limit and filter appropriately (e.g., permit ND/RA on local segments, police floods). Blocking ND/RA leads to “can’t reach anything” symptoms even when links are up.
Dual-stack monitoring (probe both v4 and v6)
- IPv4 and IPv6 often take different routes, peers, and policies, so their performance can diverge.
- Run separate ICMP probes for v4 and v6 to the same targets (or v6-equivalent targets). Baseline and alert per stack; don’t assume v4 results represent v6.
- Ensure your agents can source IPv6 (global or ULA) and that ACLs/filters allow Echo and key ICMPv6 control messages.
MTU & fragmentation differences (PMTUD is critical)
- In IPv6, routers don’t fragment packets. When a packet is too large for a link, the router sends ICMPv6 “Packet Too Big” back to the sender.
- If those messages are filtered, Path MTU Discovery (PMTUD) fails and you’ll see odd stalls (e.g., TLS handshakes or large HTTP responses hanging).
- Allow “Packet Too Big” and consider testing with larger probe sizes to catch PMTU mismatches early; annotate MTU values in your dashboards.
Treat ICMPv6 as operational traffic: allow ND/RA and “Packet Too Big,” rate-limit instead of blocking, and monitor IPv4 and IPv6 paths separately. Do that, and your dual-stack environment will behave predictably, and your troubleshooting won’t miss IPv6-specific failures.

FAQs About ICMP Monitoring
1. Is it safe to allow ICMP?:
Yes—when you scope it and rate-limit it. Allow Echo Request/Reply for monitoring and key control messages (e.g., Time Exceeded, Destination Unreachable). For IPv6, don’t block ND/RA or “Packet Too Big.” Apply ACLs to trusted interfaces and police PPS so control planes stay protected.
2.Why does ping fail but the site works?:
Many networks de-prioritize or block ICMP, so probes can drop even when TCP/HTTP traffic is fine. NAT/firewall rules or asymmetric paths can also skew results. Verify with a TCP ping or a simple HTTP check to confirm user impact.
3. What’s a “good” latency?:
Good latency depends on geography and path. Use your own baseline and watch p95: same-metro paths might be single-digit ms; regional often 10–30 ms; cross-continent 80–150+ ms. Alert on relative change (e.g., +50% p95 for 15 minutes), not absolute numbers alone.
4. How often should I ping?:
Start at 1–5 seconds for sensitive links and real-time workloads; 15–60 seconds is fine for general health. Shorter intervals inside your network, longer to the public Internet. Always respect device rate limits.
5. ICMP vs SNMP vs NetFlow, what’s the difference?
ICMP: End-to-end path health—RTT, jitter, loss, reachability.
SNMP: Device metrics—interface errors/discards, CPU/memory, link states.
Flow/NetFlow/IPFIX: Traffic patterns—who’s talking to whom, volumes, top talkers/apps.
Use ICMP to flag issues fast, SNMP to explain why, and flow data to see who/what is driving them.
6. Should you monitor ICMPv6?:
Yes. Dual-stack paths often differ. Run separate v4 and v6 probes, baseline each, and make sure critical ICMPv6 control messages (ND/RA, “Packet Too Big”) are permitted and rate-limited rather than blocked.
7. Can ICMP/ ping measure bandwidth?
No. ICMP tells you reachability/latency/loss, not throughput. Use iperf or flow/SNMP interface counters for bandwidth.
8. Why does traceroute show huge RTT or 100% loss at mid-path hops?
Routers may de-prioritize or silence TTL-expired replies while still forwarding traffic. Focus on the destination hop and the pattern across multiple traces, not a single noisy router.
9. Do ICMP probes create meaningful load?
At 1–5s with 32–64-byte payloads, overhead is negligible. Problems usually come from too many targets or synchronized bursts—stagger schedules and rate-limit.
10. Should I allow ICMP inbound to every server?
Usually no. Allow Echo (and key control messages) from trusted monitoring sources or run probes outbound from on-prem/cloud agents so replies are statefully allowed back.
11. *Can ICMP detect one-way latency?
Not by itself (it’s round-trip). For one-way measurements you need clock-synchronized agents (e.g., NTP/GPS) and protocols/tests designed for that.
12. Why is jitter high even when average RTT looks fine?
Queueing/burst loss and variable return paths can spike inter-probe variance. That’s why tracking jitter (not just mean RTT) matters for voice/video.
13. Does MTU affect ping?
Yes. If “fragmentation needed/Packet Too Big” messages are blocked, large packets stall. Test with larger ICMP sizes (DF set in v4) to catch PMTU issues; in v6, allow "Packet Too Big."
14. Is it okay to ping public DNS/SaaS endpoints?
Moderately and respectfully. Prefer your ISP’s resolvers and your own SaaS monitoring targets. Keep intervals modest and avoid using random third-party IPs as perpetual targets.
15. What if ICMP is blocked but I still need monitoring?
Use TCP ping to a known port or lightweight HTTP/HTTPS checks. Many monitoring platforms fall back automatically when ICMP is filtered.
16. Why do my laptop pings differ from the monitoring agent?
Wi-Fi, power-saving NIC settings, local CPU load, and different paths (NAT, VPN, split-tunnel) can skew results. Treat dedicated agents as the source of truth.
17. Can QoS change ICMP behaviour?
Yes—ICMP is often in a default/low-priority class. That’s fine for early warning but can make RTT/loss look worse than app traffic. Confirm impact with TCP/HTTP.
18. How do I reduce alert flapping on noisy links (e.g., broadband/Wi-Fi)?
Use longer windows (5–15 min), require 3–5 consecutive misses, alert on p95 not p50, and group alerts by site/ISP.
19. Which ICMP types should be allowed?
- IPv4: Echo Request/Reply, Destination Unreachable (esp. fragmentation needed), Time Exceeded.
- IPv6: Neighbor Discovery (NS/NA), Router Advertisements, Packet Too Big, Echo. Prefer rate-limit over block.
20. Does ICMP use ports?
No. It’s neither TCP nor UDP, so there are no ports, just message types/codes. That’s why some firewalls treat it differently.
Get Started with ICMP Monitoring
Ping starts as a quick sanity check; with ICMP monitoring it becomes a steady heartbeat for your network. You’ve seen what ICMP is and how it works (echo, TTL, unreachable), which metrics matter (RTT, jitter, loss, reachability, path changes), where it shines and where it doesn’t, and how it pairs with TCP/HTTP/UDP probes and SNMP/flow to tell a complete story.
If you’re rolling this out now, start small: pick 3–6 targets per site (gateway, ISP hop, DNS, key SaaS), run 1–5s probes for sensitive links, keep payloads light, and compare p50/p95 over a few weeks to set thresholds that reflect your reality. When ICMP fires, confirm impact with a TCP/HTTP check; if it’s real, your traceroute snapshots should already point to the hop, ASN, or MTU change that explains it.
Want the “correlate → confirm → prove” visibility? Obkio’s distributed agents run ICMP alongside TCP/HTTP/UDP, baseline latency/jitter/loss, auto-capture traceroutes on anomalies, and make it easy to share evidence with your ISP.
Deploy an agent on-site and one in your DC or cloud, add a cloud agent, and you’ll have clean signals and actionable alerts in minutes.

- 14-day free trial of all premium features
- Deploy in just 10 minutes
- Monitor performance in all key network locations
- Measure real-time network metrics
- Identify and troubleshoot live network problems

