


Table of Contents
Table of Contents
Are you tired of slow Internet speeds and mysterious network hiccups? Well, fear not because we have the ultimate solution for you: a Raspberry Pi network monitor setup with Obkio!
Cloud and hosted solutions are becoming more and more popular, which makes monitoring network performance more important than ever. Luckily, Obkio's Raspberry Pi network monitor allows you to easily monitor network performance with a Raspberry Pi - without the complexities of many of the open source solutions on the market.
By installing Obkio on your Raspberry Pi, you can keep a watchful eye on your network's performance and pinpoint any issues before they turn into major headaches. And let's be honest, who doesn't love a good tech project that involves a Raspberry Pi?
So, whether you're a seasoned tech pro or a curious beginner, join us on this journey as we show you how to create the ultimate Raspberry Pi network monitoring setup with Obkio. Keep reading for the complete Raspberry Pi network monitor installation!
Why Use a Raspberry Pi Network Monitor? 
Cloud and hosted solutions (ex: VoIP and SaaS), network architectures are changing and network monitoring solutions need to keep up.
We’re moving away from centralized monitoring in data centers and towards performance monitoring from the end-user perspective. This way, IT teams get more visibility and information about the quality of experience for the end-users, which is what matters most in the end.
Network monitoring with Raspberry Pi will help you do just that. Using a Raspberry Pi network monitor has a number of advantages for both home users and businesses. Here are some of the key reasons why you might consider using one:

- Cost-effective: Raspberry Pi devices are relatively inexpensive compared to other network monitoring solutions, making them an affordable option for individuals and small businesses.
- Customizable: Raspberry Pi devices are highly customizable, which means you can configure them to meet your specific network monitoring needs.
- Compact: Raspberry Pi devices are small and lightweight, making them easy to place anywhere in your home or office.
- Low power consumption: Raspberry Pi devices are designed to consume very little power, which means you can leave them running 24/7 without worrying about high electricity bills.
- Versatile: Raspberry Pi devices can run a variety of network monitoring software, including Obkio, which allows you to monitor your network's performance in real-time.
By using a Raspberry Pi network monitor, you can gain valuable insights into your network's performance and take proactive steps to improve it. Whether you're a home user or a business owner, a Raspberry Pi network monitor can help you save time, money, and frustration by keeping your network running smoothly.

How to Choose the Right Raspberry Pi Model for A Raspberry Pi Network Monitor
One important step of the process when you're diy-ing your own Raspberry Pi network monitor is choosing the right raspberry Pi model that can support the software and needs of your company. When it comes to choosing the right Raspberry Pi model for network monitoring, there are a few factors to consider. Here are some key things to keep in mind:
- Processing power: The Raspberry Pi's processing power can impact its ability to effectively monitor a network. If you have a large network with many devices, you may need a more powerful Raspberry Pi to handle the load. The Raspberry Pi 4, for example, offers significantly more processing power than the earlier models.
- Memory: Like processing power, the amount of memory (RAM) your Raspberry Pi has can impact its ability to effectively monitor a network. If you plan to run other programs or processes on your Raspberry Pi in addition to network monitoring, you may need more memory. The Raspberry Pi 4 is available with up to 8GB of RAM.
- Ethernet ports: The number of Ethernet ports on your Raspberry Pi can impact its ability to monitor your network. If you need to monitor multiple subnets or segments of your network, you may need a Raspberry Pi with multiple Ethernet ports. The Raspberry Pi 4, for example, has two Gigabit Ethernet ports.
- Wi-Fi: If you plan to use your Raspberry Pi for wireless network monitoring, you'll need to choose a model that supports Wi-Fi. The Raspberry Pi 3 and 4 both have built-in Wi-Fi.
- Form factor: Finally, consider the form factor of your Raspberry Pi. If you plan to mount it in a small space or use it as part of a portable network monitoring solution, you may want to choose a smaller form factor, such as the Raspberry Pi Zero.
Ultimately, the right Raspberry Pi model for network monitoring will depend on the specific needs of your network and how you plan to use your Raspberry Pi. By considering factors like processing power, memory, Ethernet ports, Wi-Fi, and form factor, you can choose a Raspberry Pi that is well-suited to your needs.
Raspberry Pi Network Monitor Installation: How to Set Up
Network Monitoring, or more specifically, Network Performance Monitoring (NPM) is the continuous monitoring of network performance, or your business' core network infrastructure to establish a network baseline, monitor network issues, and identify any network performance degradation.
When you’re looking to deploy a network monitoring tool or probe (which we call Monitoring Agents), you could use any dedicated network device but SBCs are the cheapest, and the Raspberry Pi is the most popular out of them all - which is what makes it so ideal to use.
Step 1. Deploy Your Raspberry Pi Network Monitor
Most of the Raspberry Pi network monitors on the market are open source, which are complicated to use and require the skills of a system admin to deploy. Not everyone has those skills, but you don’t actually need them to deploy a Raspberry Pi network monitor.
Obkio Network Performance Monitoring software is an end-to-end network monitoring software that can be installed on Raspberry Pi to monitor any network infrastructure.

Obkio is not open source, but it’s designed to be simple and easy to use for the whole IT team - not just network admins. Using Obkio’s free-trial or free plan, you can start network monitoring on Raspberry Pi in just 10 minutes!


The Benefits of Obkio For Your Raspberry Pi Network Monitor
There are several advantages of using Obkio for a Raspberry Pi network monitor. Here are some of the key benefits:
- Real-time monitoring: Obkio provides real-time monitoring of your network's performance, which means you can quickly identify and resolve issues before they impact your users.
- Customizable dashboards: Obkio allows you to create customized dashboards that display the metrics that matter most to you, so you can easily keep track of your network's performance at a glance.
- Alerting and notifications: Obkio can alert you when your network's performance falls outside of your specified thresholds, so you can take action before the issue becomes a major problem. You can choose to receive alerts via email, Slack, PagerDuty, or other channels.
- Historical data analysis: Obkio stores historical data on your network's performance, so you can track trends over time and identify patterns that may be affecting your network's performance.
- Easy installation: Obkio is easy to install on your Raspberry Pi and requires no special technical expertise. Once installed, it runs quietly in the background, allowing you to focus on other tasks.
- Scalability: Obkio is scalable and can monitor networks of any size, so whether you have a small home network or a large enterprise network, Obkio can handle the job.
Overall, Obkio provides a powerful and easy-to-use solution for network monitoring on a Raspberry Pi. Its real-time monitoring, customizable dashboards, alerting and notifications, historical data analysis, easy installation, and scalability make it an ideal choice for anyone looking to monitor their network's performance with a Raspberry Pi.

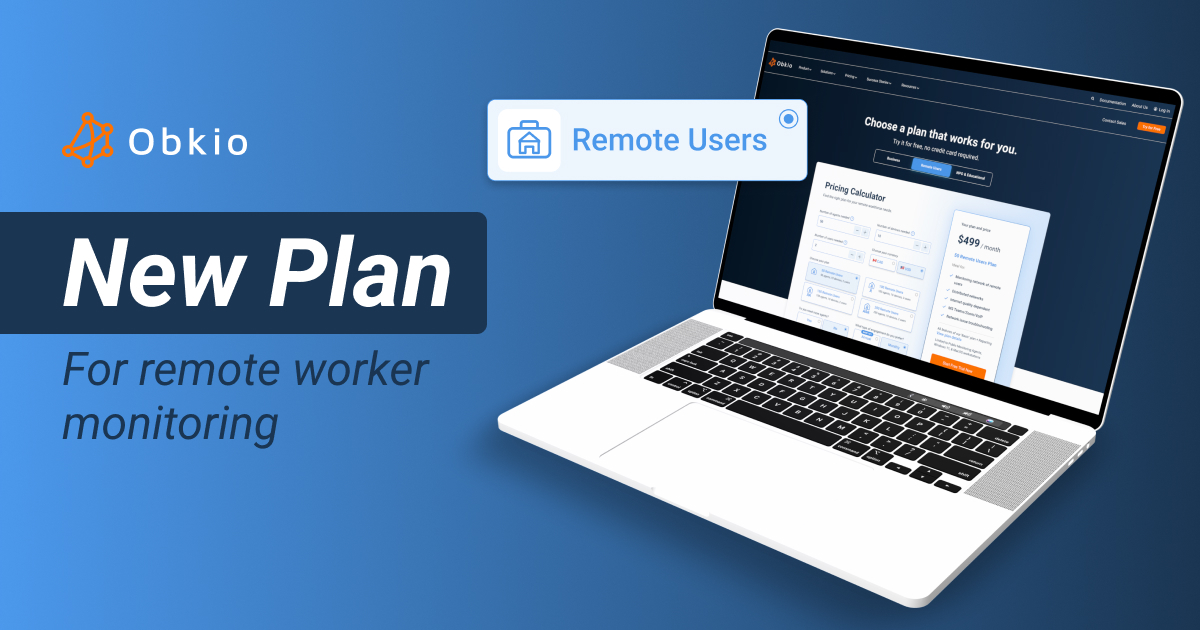
Are you a network admin or IT pro looking to monitor network performance for your business, or a remote worker trying to monitor network performance from your remote office? Whether you need to monitor large networks or single-user workstations, Obkio's Network Monitoring Tool has plans tailored for you. Find the right plan to help you monitor network performance and identify performance issues with ease.
Step 2. Install Raspbian to Transform Your Raspberry Pi Network Monitor
Once you’ve deployed Obkio, the next step for network monitoring with Raspberry Pi is installing Raspbian (the Raspberry Pi Debian Linux distribution) on the Raspberry Pi device.
If you are new to the Raspberry Pi initial setup, we recommend you follow the official Setting up your Raspberry Pi Tutorial. Other Raspberry Pi Linux distributions should also work just fine.
If you have any trouble with other distributions, you can post on the Community Forums.
Step 3. Deploy Monitoring Agents for an End-to-End Raspberry Pi Network Monitoring Experience
Once you finish installing the Raspberry Pi and have terminal access to it (SSH or Desktop), the installation should be very straight forward.
To monitor network performance from the end-user perspective you need to install probes, or as we call them, Monitoring Agents, in strategic network locations such as the head office, data centers, the Cloud, service provider networks, and of course, the remote offices where end-users are working.

For your Raspberry Pi network monitor, just follow the standard Software Agent Installation.
Ensure that you are user root by executing the command sudo su - before running the installation command provided in the App.
Like mentioned in Step 1, you can get started with Obkio’s 10 minute installation tutorial in which you will learn how to install a software agent (i.e. the Raspberry Pi) and two Public Monitoring Agents.
This way, you’ll have a full monitoring setup to start network monitoring with Raspberry Pi.
For more information about installing the Raspberry Pi network monitor, check out our installation guide:
Use Obkio's Linux installation guide to install network monitoring on Raspberry Pi.
Learn moreStep 4. How to Monitor Raspberry Pi Network Performance
The installation for your Raspberry Pi network monitor is as easy as it is any other Linux machine. One single line of command to copy & paste in a terminal and you’re good to go with your new Raspberry Pi network performance monitor.
All the updates will be done automatically, but you can follow the maintenance notice for Obkio’s Monitoring Agent updates on the System Status website.
With Obkio’s network monitoring solution deployed, the Monitoring Agents on your Raspberry Pi will start exchanging synthetic traffic (no packet capture required) to continuously monitor network performance and identify network problems.
Step 5. Measure Network Metrics on Your Raspberry Pi Network Monitor
Determining what metrics to monitor is a critical step in setting up your Raspberry Pi network monitor with Obkio. To ensure you're monitoring the right metrics for your network, consider the following factors:
- Network Infrastructure: The type of network infrastructure you have will influence the types of metrics you need to monitor. For example, if your network uses wireless connections, monitoring signal strength and packet loss rates will be more important than monitoring cable quality.
- Business Needs: Your organization's business needs and priorities will dictate which metrics are most important to monitor. For example, if your organization relies heavily on video conferencing, monitoring metrics like jitter and latency will be critical.
- Network Capacity: The size and complexity of your network will influence the types of metrics you should monitor. For example, if your network spans multiple locations, monitoring bandwidth usage across all locations will be important to ensure optimal performance.
- Troubleshooting Needs: Consider the types of network issues you've experienced in the past and which metrics would have been helpful in troubleshooting those issues. This can help you identify which metrics to prioritize for monitoring.

Obkio's Network Response Time Graph with network metric measurements.
Once you've considered these factors, you can determine which specific metrics to monitor. Your Raspberry Pi network monitor (using Obkio), will use synthetic traffic and UDP packet to measure key network metrics like:
- Latency: The time it takes for a packet to travel from one device to another.
- Packet Loss: The percentage of packets that fail to reach their destination.
- Jitter: The variability in latency over time.
- Throughput: The amount of data passing through the network from point A to point B in a determined amount of time.
- Bandwidth Usage: The amount of network bandwidth being used by specific devices or applications.
And so much more! Measuring these network metrics allows you to quickly understand and identify any performance degradation in your network, which may be a sign of a network issue to come.
Step 6. Monitor Network Devices on Your Raspberry Pi Network Monitor Using SNMP
Setting up network devices to monitor is a critical step in setting up your Raspberry Pi network monitor. The devices you choose to monitor will depend on your network's size, complexity, and purpose. Use Network Device Monitoring with SNMP Polling to monitor and proactively pinpoint issues with devices like firewalls, routers, switches and wifi access points.
In addition, Network Device Monitoring measures the health of your network devices with metrics like CPU usage and bandwidth usage.

Here are some tips for setting up network devices to monitor with Obkio:
- Identify your critical devices: The first step in setting up network devices to monitor is to identify your most critical devices. These may include routers, switches, servers, or other devices that are essential to your network's performance.
- Determine what metrics to monitor: Once you've identified your critical devices, you'll need to determine what metrics you want to monitor for each device. Obkio allows you to monitor a wide range of metrics, including latency, packet loss, bandwidth usage, and more.
- Configure device monitoring: Obkio makes it easy to configure device monitoring for your network devices. You'll need to enter the IP addresses or hostnames of the devices you want to monitor and select the metrics you want to track.
- Verify monitoring: After configuring device monitoring, it's important to verify that it's working properly. Obkio provides a dashboard that displays real-time performance metrics for your devices, allowing you to verify that they are being monitored correctly.
- Add additional devices: As your network grows and evolves, you may need to add additional devices to your monitoring setup. Obkio makes it easy to add new devices to your network monitor, so you can keep track of all your critical devices.
By setting up network devices to monitor with Obkio, you can gain valuable insights into your network's performance and identify potential issues before they become major problems.
Step 7. Set Up A Raspberry Pi Network Monitor Dashboard
At this point, your raspberry pi network monitor will start monitoring network performance and collecting performance data. But how can you organize this data so you can more easily understand the current state of your network. You configure an affecting Network Monitoring dashboard.

Using Obkio's Network Monitoring tool, you can easily configure and customize your dashboard to show you the information that matters most. But how do you decide what to add?
When deciding what data to include in your Raspberry pi network monitoring dashboard, it's important to consider your organization's specific needs, the nature of your network, and the goals of your monitoring efforts. Here are some tips:
1. Define Objectives and Goals:
Clearly outline the objectives and goals of your network monitoring. Are you primarily concerned with performance, security, or both? Understanding your goals will guide the selection of relevant metrics.
2. Understand Your Network Architecture:
Consider the size and complexity of your network. Different network architectures may require monitoring different sets of metrics. For example, a distributed network may require more emphasis on latency and bandwidth, while a security-focused network may prioritize intrusion detection metrics.
3. Identify Critical Applications and Services:
Determine which applications and services are critical to your organization. Monitor metrics related to the performance and availability of these key components.
4. Consider User Experience:
Include metrics that reflect the end-user experience. This could include application response times, website loading times, and other factors that directly impact users.
5.Prioritize Network Performance Metrics:
Identify key network performance metrics that align with your organization's goals. These could include metrics related to network reliability, service uptime, and user satisfaction.
6. Balance Depth and Breadth:
Find a balance between the depth and breadth of monitoring. While it's important to have a comprehensive view of your network, avoid overwhelming the dashboard with too much data. Focus on the most critical and actionable information.
7. Provide Context:
Include context for metrics to aid in interpretation. For example, compare current performance metrics with historical data or industry benchmarks to provide context for analysis.

Remember that the effectiveness of your network monitoring dashboard relies on the relevance and accuracy of the included metrics. Regularly revisit and refine your monitoring strategy to ensure it remains aligned with your organization's evolving needs.
Step 8. Configure Alerts For Network Issues on Your Raspberry Pi Network Monitor
Configuring network monitoring alerts for network issues is an important step in setting up your Raspberry Pi network monitor. Alerts allow you to receive notifications when your network's performance falls outside of your specified thresholds, so you can quickly identify and resolve issues.
Here are some tips for configuring alerts with Obkio:
- Set thresholds: The first step in configuring alerts is to set thresholds for the metrics you want to monitor. For example, you might set a threshold for network latency, packet loss, or bandwidth usage. Obkio allows you to set both warning and critical thresholds, so you can receive alerts at different levels of severity.
- Test your alerts: Before deploying your network monitor, it's important to test your alerts to make sure they are working properly. Obkio provides a test mode that allows you to simulate network issues and ensure that your alerts are configured correctly.
- Refine your alerts: Once your network monitor is up and running, you may find that your alerts are too sensitive or not sensitive enough. Obkio allows you to refine your alerts over time based on your network's performance and your own experience.
By configuring alerts with Obkio, you can be sure that you'll be notified when your network's performance falls outside of your desired thresholds. This allows you to take action quickly and prevent issues from becoming major problems.
Step 9. Use Your Raspberry Pi Network Monitor to Analyze Historical data
Historical data analysis is a crucial component of a Raspberry Pi network monitor. It allows you to analyze performance trends over time, identify long-term issues, and make data-driven decisions about your network's configuration and performance.
Here are some tips for historical data analysis with Obkio:
- Visualize data trends: Obkio provides powerful data visualization tools that allow you to visualize trends in network performance over time. You can view historical data for each metric you're monitoring, and Obkio allows you to customize your data visualization to meet your needs.
- Identify long-term issues: By analyzing historical data, you can identify long-term issues that may be impacting your network's performance. For example, you might notice that your network experiences increased latency during certain times of day or that packet loss rates have been slowly increasing over time.
- Compare performance across devices: Historical data analysis allows you to compare performance across different devices on your network. This can help you identify performance issues that are specific to certain devices or locations on your network.
- Identify potential bottlenecks: By analyzing historical data for network bandwidth usage, you can identify potential bottlenecks that may be impacting your network's performance. This can help you make informed decisions about how to allocate network resources to ensure optimal performance.
- Use data to make informed decisions: Historical data analysis provides valuable insights into your network's performance, and you can use this data to make informed decisions about your network's configuration and performance. For example, you might use historical data to determine when it's time to upgrade your network infrastructure or to identify specific devices that need to be optimized for better performance.
By leveraging historical data analysis with Obkio, you can gain a deeper understanding of your network's performance and take proactive steps to ensure optimal performance and reliability.
Step 10. Troubleshoot Network Problems with Traceroutes
With this setup, your Raspberry Pi network monitor will help you monitor network performance and identify network problems.
At this point, you will have access to valuable data from Obkio's Features like dashboards, advance reporting, Speed Tests (to monitor network speed) and Obkio Vision: Visual Traceroute tool.
Traceroutes are a powerful tool for network troubleshooting, allowing you to identify the path that your network traffic takes and to identify potential issues along that path. Obkio’s advanced visual traceroute tool detects exactly where and when network problems occurred by interpreting traceroute results for you and leveraging visual network maps, and Obkio’s Quality Score matrix.
 Obkio Vision Network Map and Traceroute Results
Obkio makes it easy to perform traceroutes and monitor network metrics. You can use Obkio's traceroute feature to trace the path of network traffic to specific devices or applications, and then monitor key metrics such as latency, packet loss, and jitter.
Here are some tips for troubleshooting common network problems using traceroutes:
- Packet Loss: If you're experiencing packet loss, use Obkio's traceroute feature to trace the path of network traffic to identify where packets are being lost. This can help you identify which devices or network segments are causing the problem.
- Latency: If you're experiencing high latency, use Obkio's traceroute feature to trace the path of network traffic and identify which devices or network segments are causing the delay. This can help you determine if there are any routing issues or congestion points that need to be addressed.
- Routing Problems: If you're experiencing routing problems, use Obkio's traceroute feature to trace the path of network traffic and identify which devices or network segments are causing the problem. You may need to work with your network provider to resolve routing issues.
In summary, using traceroutes with Obkio can help you monitor network metrics and troubleshoot network problems. By tracing the path of network traffic and monitoring key metrics, you can identify potential issues and take steps to address them, ensuring optimal network performance.
When Should You Use A Raspberry Pi Network Monitor? (Use Cases)
So you're thinking about using a Raspberry Pi to monitor your network. But who’s this actually good for? The short answer: a lot of people. Whether you’re supporting a business network or just trying to figure out why your Zoom calls keep dropping at home, the humble Pi has your back.

Small & Medium Businesses (SMBs)
Let’s be honest — not every business has the budget for enterprise-grade network monitoring gear. A \$50 Raspberry Pi can give you great visibility into internet performance, internal latency, and even application availability. It’s perfect for monitoring branch office links or keeping tabs on a VoIP setup that’s acting up again.
Remote Workers & Home Offices
With hybrid work now the norm, IT teams are blind once users leave the building. Drop a Pi at the home office and boom — you can monitor VPN performance, spot flaky Wi-Fi, and get some actual data to back up those “the internet’s slow again” tickets.
Managed Service Providers (MSPs)
If you’re managing a bunch of client sites, the Pi is your secret weapon. You can ship it out pre-configured, plug it in at the client site, and start getting live network metrics — no need for heavy on-site setups. Perfect for SLA reporting, proactive alerts, or just proving that “it’s the ISP, not us.”
Schools, Libraries & Nonprofits
Tight budget? No problem. A Raspberry Pi can give you visibility across classrooms or office spaces without breaking the bank. Log performance, keep tabs on cloud apps like Google Workspace or Zoom, and even use it to file solid complaints when your ISP underdelivers.
Construction Sites & Pop-Up Networks
Need to monitor a job site or a temporary office with spotty LTE? Toss a Pi on the network and let it track uptime, packet loss, and latency. It’s small, rugged (enough), and you can SSH in from anywhere.
IT Labs, QA, & R\&D Teams
Testing new gear? Validating app performance across different regions? Pi devices make great little agents for synthetic testing. Hook them into Prometheus or something like Obkio and you’ve got a distributed testbed for all your nerdy experiments.
🌍 Multi-Location Enterprises
If you’re running IT for a company with a dozen branches across the country (or globe), this is a no-brainer. Stick a Pi at each site, collect real-time metrics, and compare network performance without investing in overpriced hardware.
🧠 And Yeah — IT Nerds At Home
Because we can. Set one up to track your bandwidth, log speed tests every hour, or catch your ISP in the act when they’re throttling you during Netflix binges. It’s a great little side project and gives you bragging rights in the Slack chat.
How to Monitor Network Traffic on Raspberry Pi
If you're looking for a more traditional way of monitoring your network, you can also use your Raspberry Pi device as a Raspberry Pi network traffic monitor. Monitoring network traffic with a Raspberry Pi is a useful way to gain insight into the behavior of your network, more specifically to identify potential security threats. Raspberry Pi network traffic monitoring does require packet capture.
Here are the steps you can follow:
1.Install a network traffic monitoring software: You can use Wireshark to monitor network traffic with Raspberry Pi, which can capture and analyze network traffic in real-time. To install Wireshark, open the Terminal on your Raspberry Pi and run the following command:
sudo apt-get update
sudo apt-get install wireshark
2.Configure network interface: Before you can start capturing network traffic, you need to configure Wireshark to listen on the network interface you want to monitor. To do this, run the following command:
sudo usermod -aG wireshark pi
sudo setcap cap_net_raw,cap_net_admin=eip /usr/bin/dumpcap
3.Start capturing network traffic: Once Wireshark is installed and configured, you can start capturing network traffic by running the following command:
sudo wireshark
4.Analyze captured network traffic: Wireshark captures network traffic in real-time and displays it in a user-friendly interface. You can use the tools provided by Wireshark to analyze the captured network traffic and identify potential security threats.
And that's how to monitor network traffic with Raspberry Pi!
Note: It's important to ensure that you have the necessary permissions to monitor network traffic on your network, and to comply with all relevant laws and regulations. Additionally, capturing network traffic may slow down your network, so it's recommended to only capture traffic when necessary.

Take Control of Your Network with Raspberry Pi Network Monitor and Obkio
Getting started with Obkio's Raspberry Pi network monitoring tool is easy - and only takes 10 minutes. You don’t have to be a network admin to understand the health of your network.
Setting up a Raspberry Pi network monitor with Obkio is a powerful way to monitor your network and ensure optimal performance. By choosing the right Raspberry Pi model, configuring alerts for network issues, setting up network devices to monitor, analyzing historical data, monitoring network metrics, and troubleshooting network problems with traceroutes, you can gain valuable insights into your network and take proactive steps to address potential issues before they impact your organization's productivity.
Obkio provides a user-friendly interface and a range of powerful monitoring features, allowing you to monitor key metrics such as latency, packet loss, and bandwidth usage, and to receive alerts when issues arise. By leveraging Obkio's traceroute feature, you can also troubleshoot common network problems and identify potential issues before they become major problems.

Overall, a Raspberry Pi network monitor with Obkio is an excellent investment for tech enthusiasts who want to ensure optimal network performance and avoid downtime. With the right setup and configuration, you can gain valuable insights into your network and take proactive steps to ensure your organization's productivity and success.
